It seems that there’s a right way and a wrong way to do everything in life. From baking a cake to parallel parking, some instruction beforehand is always a good idea. The way you floss is no exception!
As a dentist, we see a lot of patients who are frustrated because their teeth and gums aren’t as healthy as they’d like, despite the fact that they’re flossing regularly. In this blog, we’ll focus on the best
way to floss, because we want our patients to get all the benefits they can from their efforts. So keep reading to learn about what flossing can do for you, how to do it, and the best type of floss to use!
How Can Flossing Benefit You?
Flossing benefits your oral health in three main ways:
- Fewer Cavities – The area where your teeth touch together is called the contact point. Floss is the only thing that can fit in between this space and remove the plaque that causes cavities. In fact, dentists find cavities in this area so often that they’re sometimes referred to as “flossing cavities,” although a more suitable name would be “not-flossing cavities!”
- Healthier Gums – All the way around each tooth is what’s called a “pocket” where plaque and bacteria can hide. In healthy gums, these pockets are between 1-3mm. Even with good brushing, you can miss the bacteria in these areas if you’re not flossing well, which can lead to gum disease and eventual tooth loss.
- Fresher Breath – Brushing only removes about 2/3 of the odor-causing bacteria in your mouth. Effective flossing will remove the other 1/3 and give you much fresher breath!
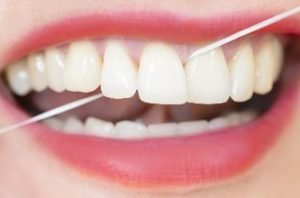
What’s the Best Way To Floss?
Try this technique at home and don’t hesitate to ask for a demonstration from your dentist at your next
checkup:
- Take about 18 inches of floss and wrap one end around the index finger of your non-dominant hand.
- Then, using the thumbs and index fingers of both hands, work with a small piece at a time, between 1-2 inches.
- You’ll want to use a back-and-forth, or seesaw motion, to get the floss past the contact point where the teeth touch. This avoids “snapping” the floss, which not only hurts but can injure the gum tissue.
- Once you’ve gotten past the contact point and have reached the gums, stop using the back-and-forth motion. Wrap the floss around the tooth in a C shape, and gently move it under the gumline in an up-and-down motion.
- Move to a new, clean piece of floss to avoid transferring bacteria between different areas.
What Kind of Floss Should You Use?
This is largely a matter of personal preference, but there are a few things to keep in mind. First, waxed floss won’t shred as easily and many people find it easier to use.
Second, there are some very slick, smooth types of floss designed for very tight teeth. If you have to use this kind, by all means, do it! But if you can, try to use a floss that’s either sticky (like waxed) or has a slightly rough texture. It will remove more plaque than the super-smooth kind.
With these flossing tips and techniques, you’ll be on your way to a healthier smile in no time!
About the Author
All of the dentists at Flenniken Family Dentistry want to see their patients be as successful as possible with their home hygiene routine. They know that great brushing and flossing can prevent the need for extensive dental work down the road, so they always take the time to teach great technique. If you have any questions, they can be reached through their
website or at (717) 249-7777.